|
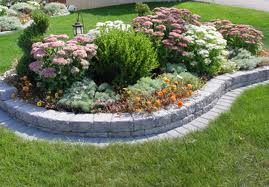
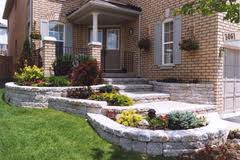
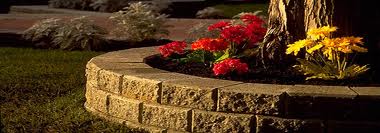
Landscaping Walls Can Be An Attractive Addition To Your Small Garden IdeaLandscaping Walls For Your Garden or Terraced Patio Any time you have a slope to deal with, or want to create a raised bed in your garden or step up in a patio, a stone or concrete retaining wall is a good bet. Natural stone, treated wood or man-made concrete blocks are traditional choices for landscaping walls in many garden designs. A Few examples of landscaping walls...:
Clearly a block retaining wall can be an attractive enhancement to your home. Installing one can be fairly easy for the do-it-yourselfer. The first step to installing your own landscaping walls is to have a plan. The simplest type of wall is built on fairly level ground, as in the first photo on the left above, the wall is all the same height and forms an enclosure that can be filled with topsoil and planted. It becomes a little more complicated if you plan on building terrace walls on sloping ground, but the principles are the same. The two projects shown below are done using Allan Block Junior concrete wall blocks and cap stones. One is on level ground and the other, curved wall is built into a slope. Measure the total length of the wall to be built. In the case of a curved wall, it is helpful to use a cloth, flexible tape measure that will follow the path of the wall. Take a measurement of the total length of the wall, including curves and straights and make a working sketch of your plan. You will also want to measure the length of each curve in the plan as the blocks you will be ordering (in the case of Allan Block) come in separate shapes for curves and straight lines. If your visit your friendly neighbourhood landscape stone supplier before you start measuring. This way you can pick out the product you would like to use and discuss your plan with the proprietor. You will then have a better idea of exactly what measurements you (and he) will need to determine the right amount of stone to buy. He may have to order in the blocks in the color and style of your choice, so try to be as accurate as possible when measuring. The details you will need to give the supplier are: Total length of the wall(s), length of straight lines, length of curves, height of wall(s), colour and style of blocks you want. A higher wall of course may require 2 or more courses (layers) of block and if you are building into a slope, the upper courses may be longer than the lower ones. 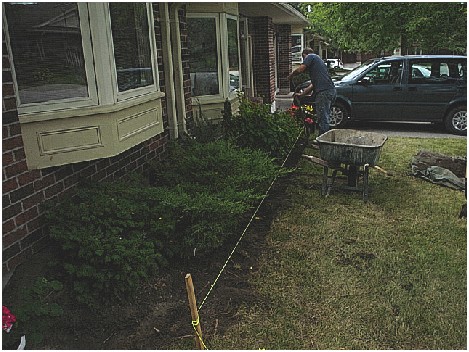 In the photo above, we have already measured and ordered the stone. The string line is staked in place to show us the outer edge of the landscaping walls as measured out from the wall of the building. The ground is sloped down toward the far end and we will have to step the wall down in the middle. The Base: The string line also guides us for the digging of the base of the wall. As with interlocking pave stones, there must be a based of crushed gravel or sand beneath the wall. It is best to remove the layer of black topsoil down to where the colour changes as this is the layer that will shift the most during freeze_up in the winter. You will have to dig deep enough to get a layer of crushed stone at least 2 inches deep beneath the blocks. 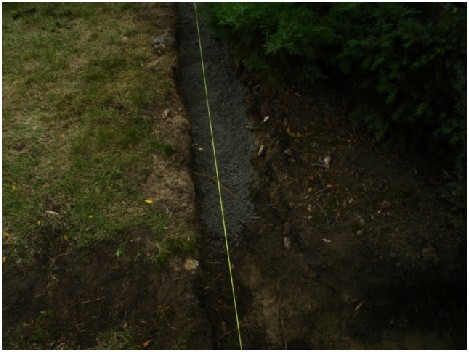 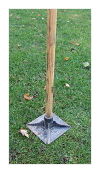 Above you can see that we have started to lay the crushed limestone into the trench. The layer of gravel is then compacted with a hand tamper (see photo on the right) --> and we use a bubble level to make sure the compacted base is roughly level before starting to lay the retaining wall blocks in place. 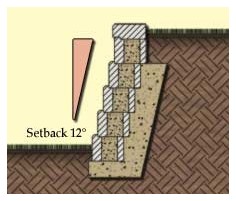 <--The sketch to the left shows a cutaway of a landscaping wall built with Allan block junior. It shows the gravel base below and behind as well as the slope back that the wall takes as more courses are added. This lean backward makes the wall more stable and able to resist the pressure of the earth behind it. The pressure is directed downward instead of pushing against the wall. In addition to the plate tamper, you will need a cutoff saw like this one to cut not only the wall blocks but the capping that goes on top. These can be rented at your local rent-all store. You will also want to pick up a dust mask, goggles and hearing protection as a cutoff saw is loud, dusty and throws ground up concrete back at the user. 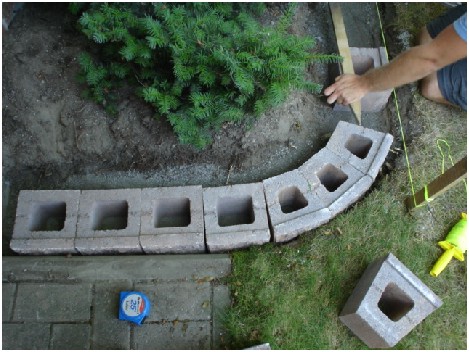 Now it's time to start laying in the blocks. You can see that the square blocks are for the straightaways and the beveled blocks fit naturally into the curve. It is extremely important to set each block in place so that it is level side to side as well as front to back and it must also be level with the blocks adjacent. For this I use 2 bubble levels. One is 4 feet long and the other is only 8 inches long. The short one is used on each block as it is set in place and then the long one is used after you have a few blocks in place and want to make sure your wall is staying level over the run. It is easy to go out of level, so check it often. 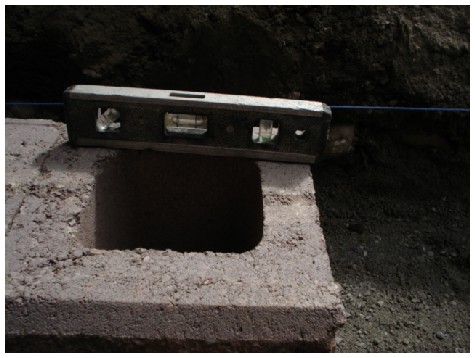 Laying in of the first course of blocks on the gravel base is a time consuming job, but you must use patience and get it right as it is the foundation of the wall and the courses that go on top will lay in much faster and easier if the base is level. TIP: Keep a 2 lb. sledge hammer or a carpenters hammer handy along with a piece of wood. You can make slight adjustments to un-level blocks with the hammer, but don't hit the block directly with the hammer or you might break it. Use the piece of wood on top of the block and hit that. |
Testimonials:
| "When we moved to Beaverton ten years ago, Lakeview Construction was HIGHLY recommended to us. We have employed them to do many jobs for us and have always been overjoyed with the results... Some of the services they have provided have included: at our first house~ installing a fence around 4 acres by hand; building a beautiful custom 15' x 6' deck with roof, replacing 15' high pillars at the front of the house and covering them in aluminum siding material; digging up the driveway and relaying drainage pipe; dozens of smaller tasks like installing pet doors and doing repairs. We have just moved into our second house and he has just installed a dog door for Great Danes in a steel door, and we intend to have him back to replace the entire main floor carpet with hardwood. My father has had him put new doors/hardware on their kitchen cabinets,replace the counter-tops, take out the old Hollywood ceiling and replace it with spotlights and re-drywall it, take out the old ceramic floor in the hall and kitchen and replace with a new one. Bruce is unfailingly polite and personable, meticulous in his standards, creative and helpful in his ideas, and reasonable in his cost. When Bruce leaves a job at the end of the day, or finishes it, you would never know he'd been there...everything is cleaned up and left in perfect condition. We recommend him VERY HIGHLY...he is EXCEPTIONAL." Diane and Michael |
| "Excellent worker, commitment as promised. Stonework landscaping very professionally completed." Junith |
----------------
Call:
Bruce Hanley,
Lakeview Landscaping and Construction
Beaverton, Ontario
705-426-5809
